
 Tutorials


 Ahura
Ahura Plugins

 Blog
BlogAdding a Search Form to Your WordPress Site with Ivory Search

If you’ve worked with WordPress, you probably know that this content management system gives you some very nice options for adding a search form, and you can place that form almost anywhere on your site you like. But there’s a catch: when it comes to the navigation menu, WordPress ties your hands and, by default, won’t let you place a search form directly in the menu, limiting you to the widget areas instead.
In this article, we’re going to show you step by step how to get around this limitation and fit a professional search form right into your site’s menu. So stick with us to the end.
Table of Contents
Why Should We Add a Search Form to the Site at All?
Before we get to the practical work, let’s take a moment to talk about why this matters.
You surely already know how big a role user experience plays in a site’s success. When you manage a site, you’re always after having your users feel good about being there. One of the most important things that builds this good experience is the user being able to reach what they’re looking for easily and quickly.
This is exactly where a search form comes to your aid. With a good search form, the user reaches their goal for visiting the site within seconds and doesn’t have to dig through every page. That’s why we strongly recommend that, to improve your site’s performance and your user’s convenience, you add a search form to your site’s menu so it’s easy to get to.
The good news is that there are plenty of plugins in the WordPress repository for this. One of the best of them — which does its job well and is free — is the Ivory Search plugin. You can use it without spending a single cent.
Getting to Know the Ivory Search Plugin

Ivory Search is a plugin that lets you fully customize your site’s search form and apply any change you like to it. To use its features, you first need to download it and install it on your site. If you’re not familiar with installing plugins, you can turn to a guide on installing WordPress plugins for help.
A Guide to Building a Search Form with Ivory Search
Now it’s time to roll up our sleeves and build a search form for our site. After installing the plugin, go into the Ivory Search settings and head to the Search Form section.
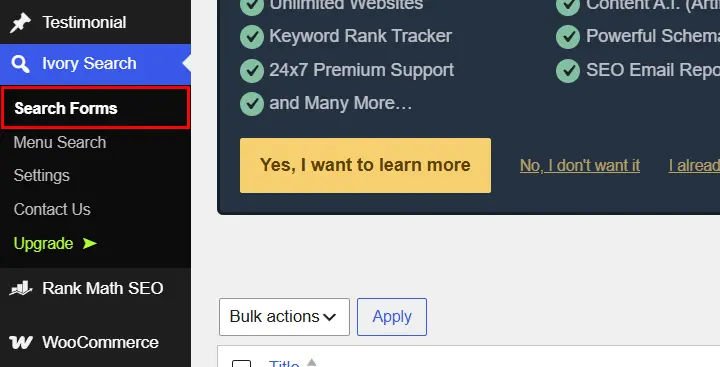
Here you’ll be met with a page full of various fields, which we’ll explain one by one.
The Includes Section: What Should Be in the Search?
The first section you’ll see is called Includes. Its job is exactly what the name suggests; here you specify what things will be searchable for the user in the search form. For example, you decide which parts of your site’s content are included in the search.
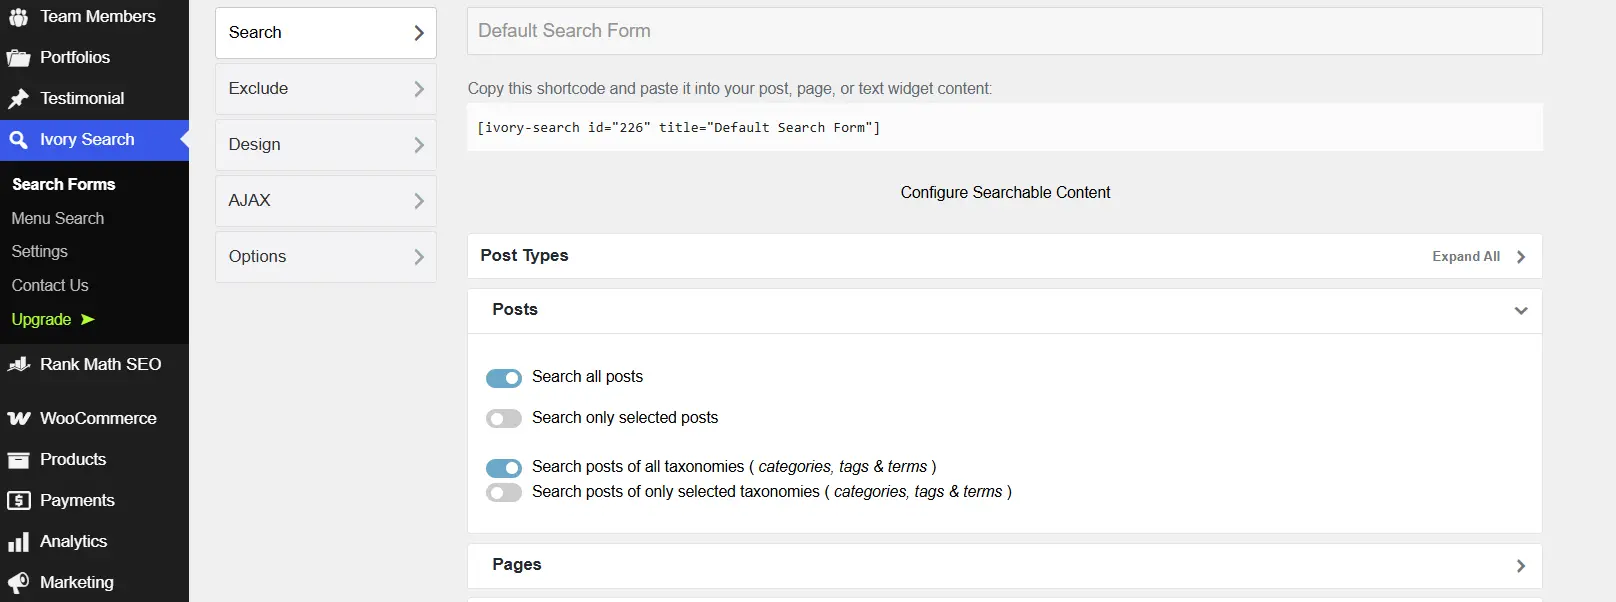
In the Post Type area, you can check any item you want so it’s included in the search results. For instance, posts, categories, custom fields, or anything else you have in mind.
The Excludes Section: What Should Be Removed from the Search?
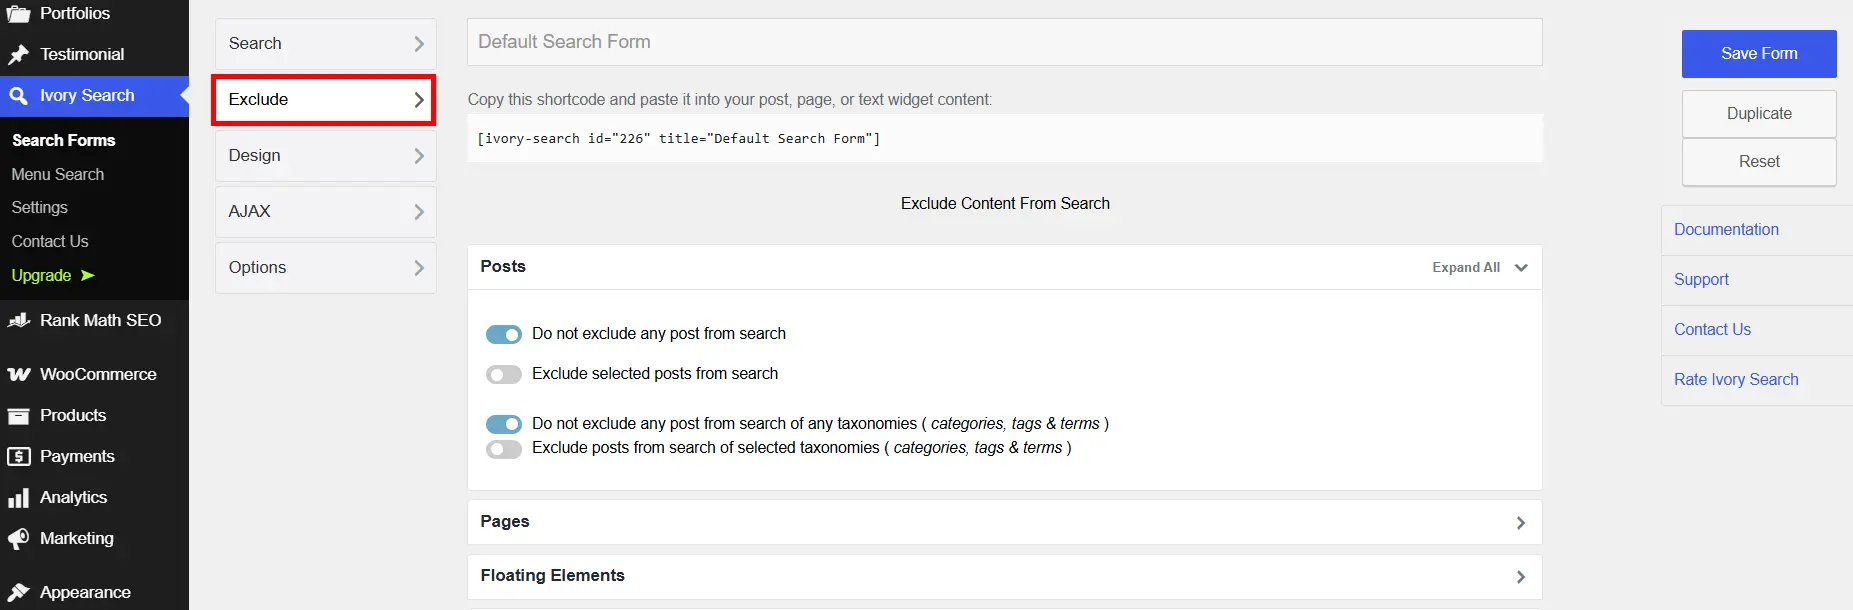
The second section you’ll see is called Excludes, and it’s the opposite of the previous one. Here you select anything you don’t want shown to the user in the search results. In effect, in this part you’re restricting the user’s access to certain areas.
Don’t forget to click the Save Form option after applying your changes so everything gets saved.
Enabling the AJAX Feature
The next section you’ll come across on this page is AJAX. By enabling this feature, search results are shown to the user without needing to reload the page, which makes for a much smoother experience. Just enable the Enable AJAX Search option to get access to the plugin’s AJAX capabilities.
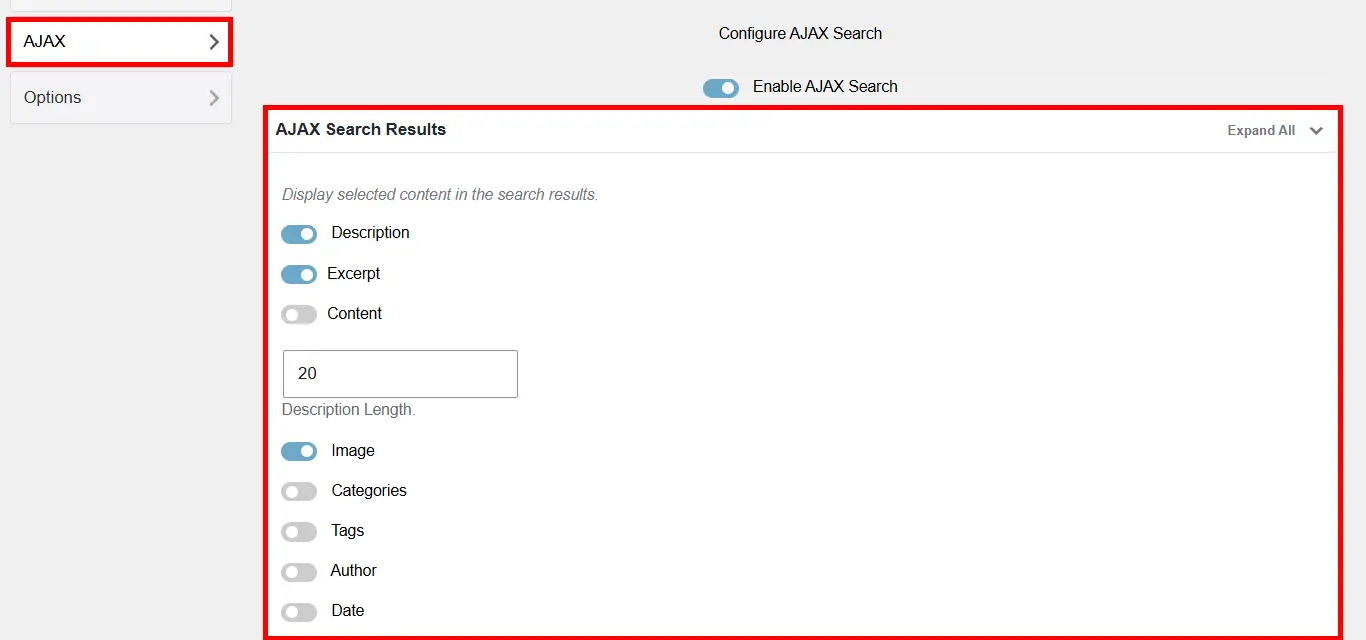
As always, don’t forget to hit Save Form to save your changes.
Setting the Number of Results Per Page
The last option you’ll see in this section is Options. Here you can specify how many results are shown to the user on each page. Enter any number you like and then hit Save Form.
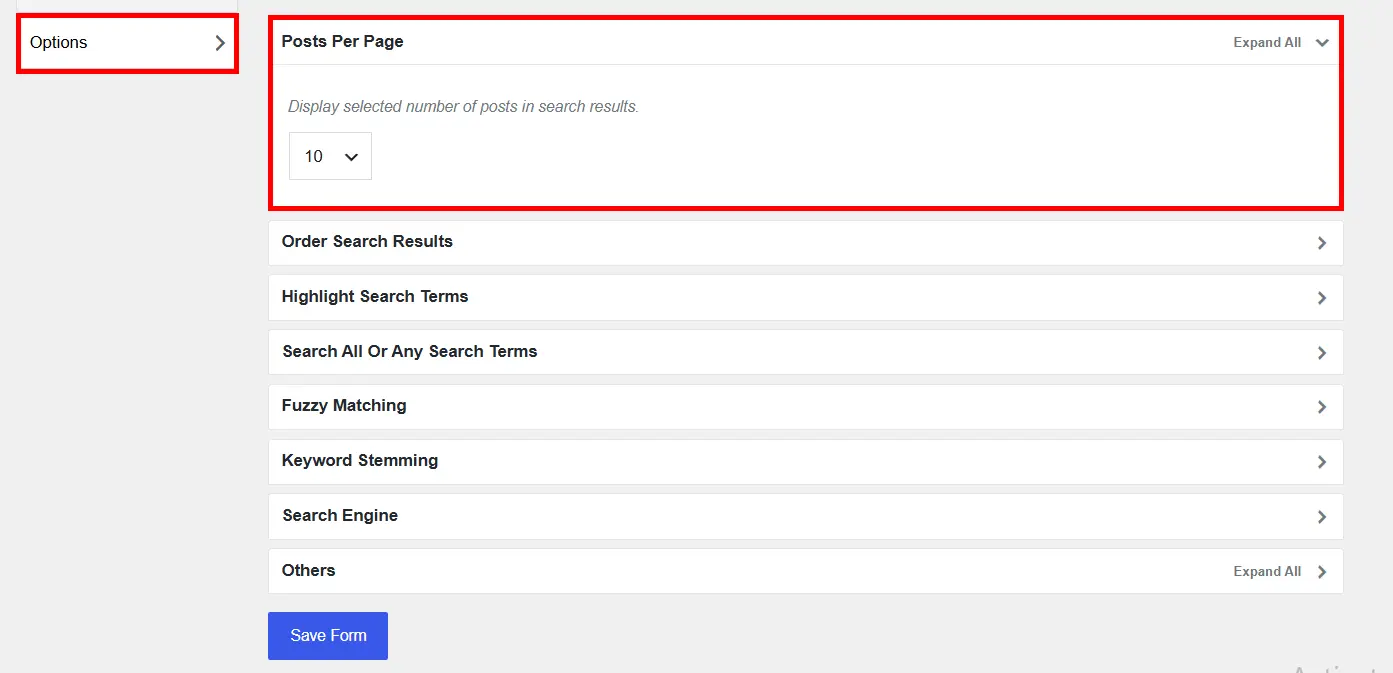
That’s it! Just like that, your site’s search form is ready. Of course, to add this form to the site’s menu, there are still a few steps left, which we’ll walk you through right here.
A Guide to Adding the Search Form to the Site Menu
Alright, now that we’ve built our search form, we need to bring it into the site’s navigation menu so the user can access it more easily.
To do this, go into the Ivory Search settings again so that a new page opens up for you. On this page you can configure your site’s search form.
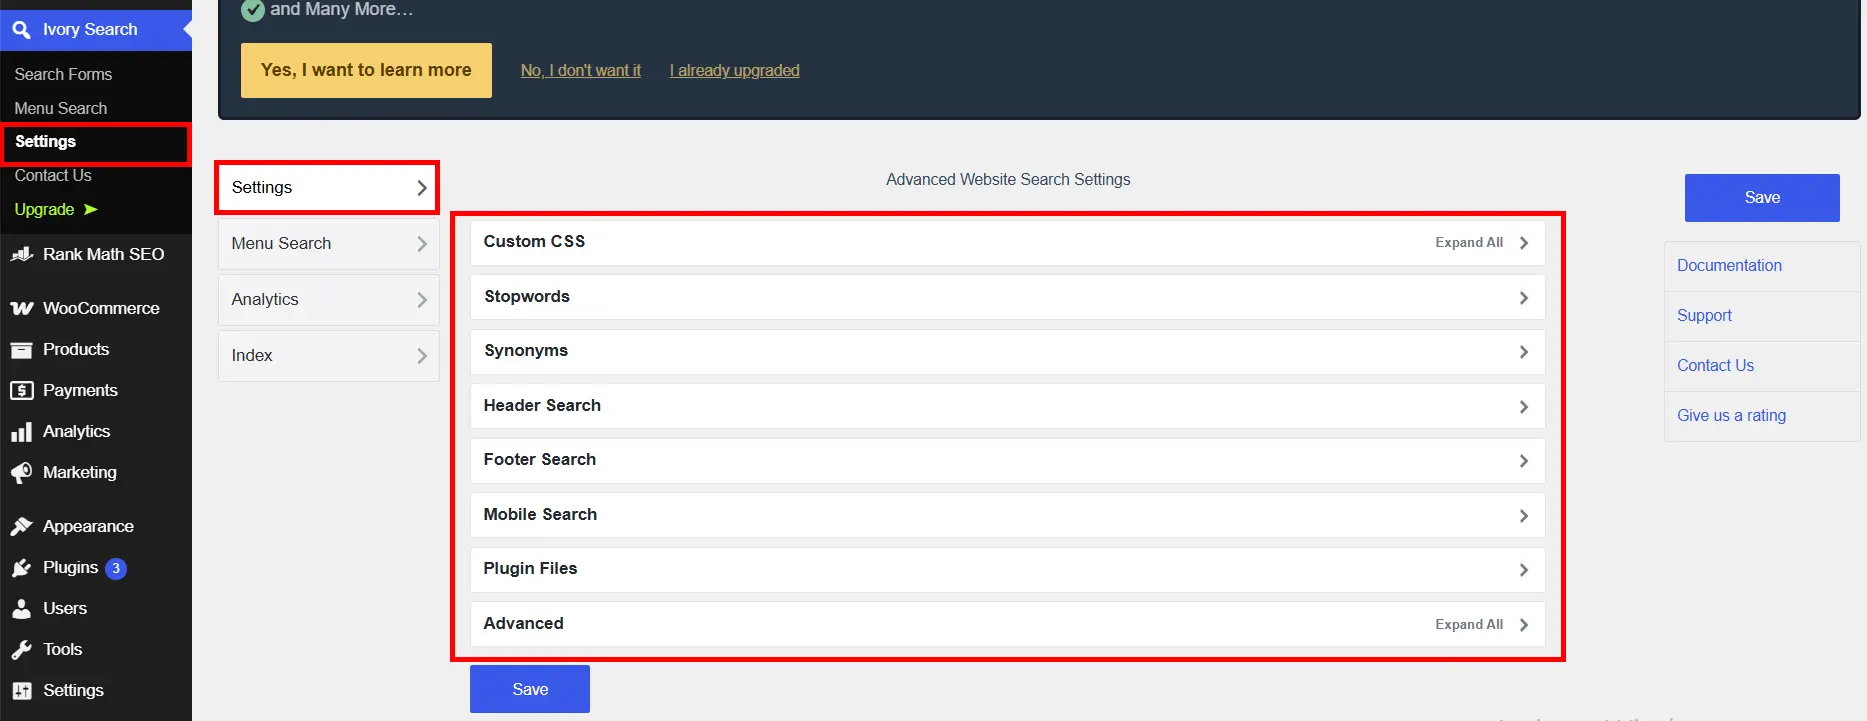
Choosing the Menu Location with Select Menu
In the Menu Search section, the first box you’ll see is Select Menu. Here you specify which part of the site the search menu is shown in. A few options are provided for you, and you should pick one to your taste for the search bar’s location.
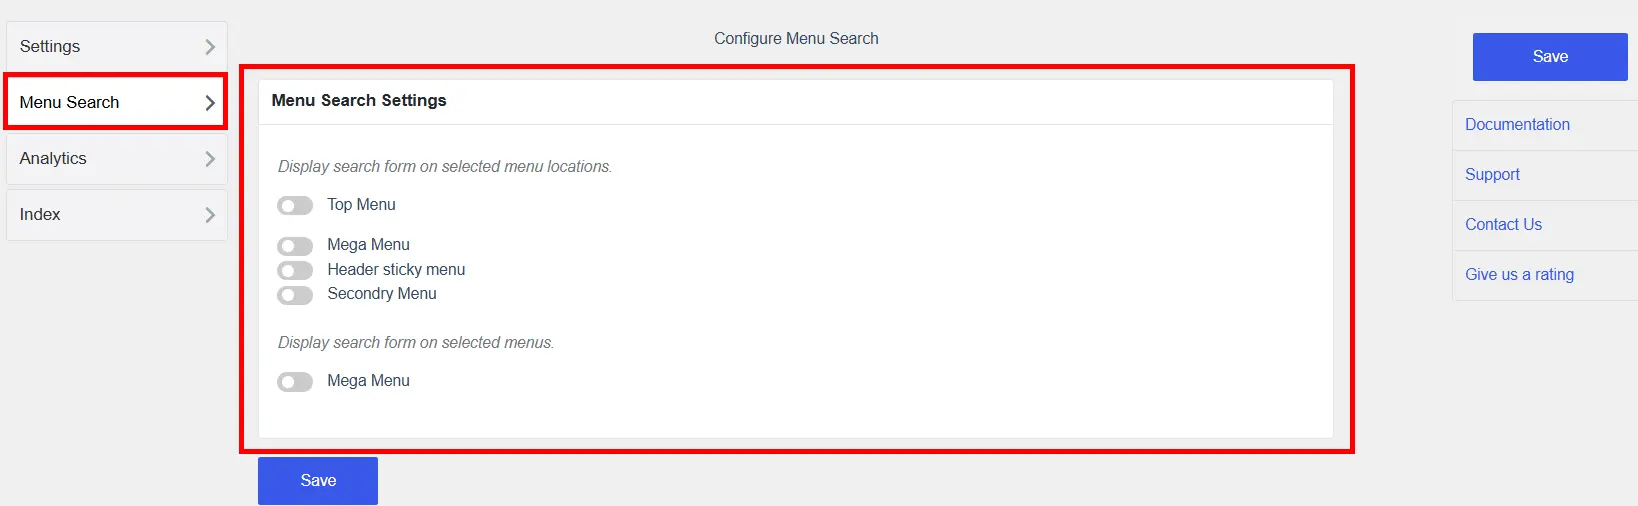
Something worth knowing: the list of menu locations depends on your WordPress theme. That is, if you change your site’s theme, these menus will change too.
Choosing the Search Form Style with Form Style
Another neat feature of this plugin is that you can choose the search form’s style yourself. To do this, after entering the settings, go to Menu Search » Form Style.
Here, five different modes are put at your disposal. You can pick and enable one of them to your taste or your site’s needs. For example, you can set the search form to appear as a pop-up, full-screen, dropdown, or other modes.
Additional Plugin Settings
The next part concerns the general settings of the Ivory Search plugin. Here you’ll see various options, each with its own particular function. For instance, if you enable the Footer Search option, your search form will also be shown in the site’s footer.
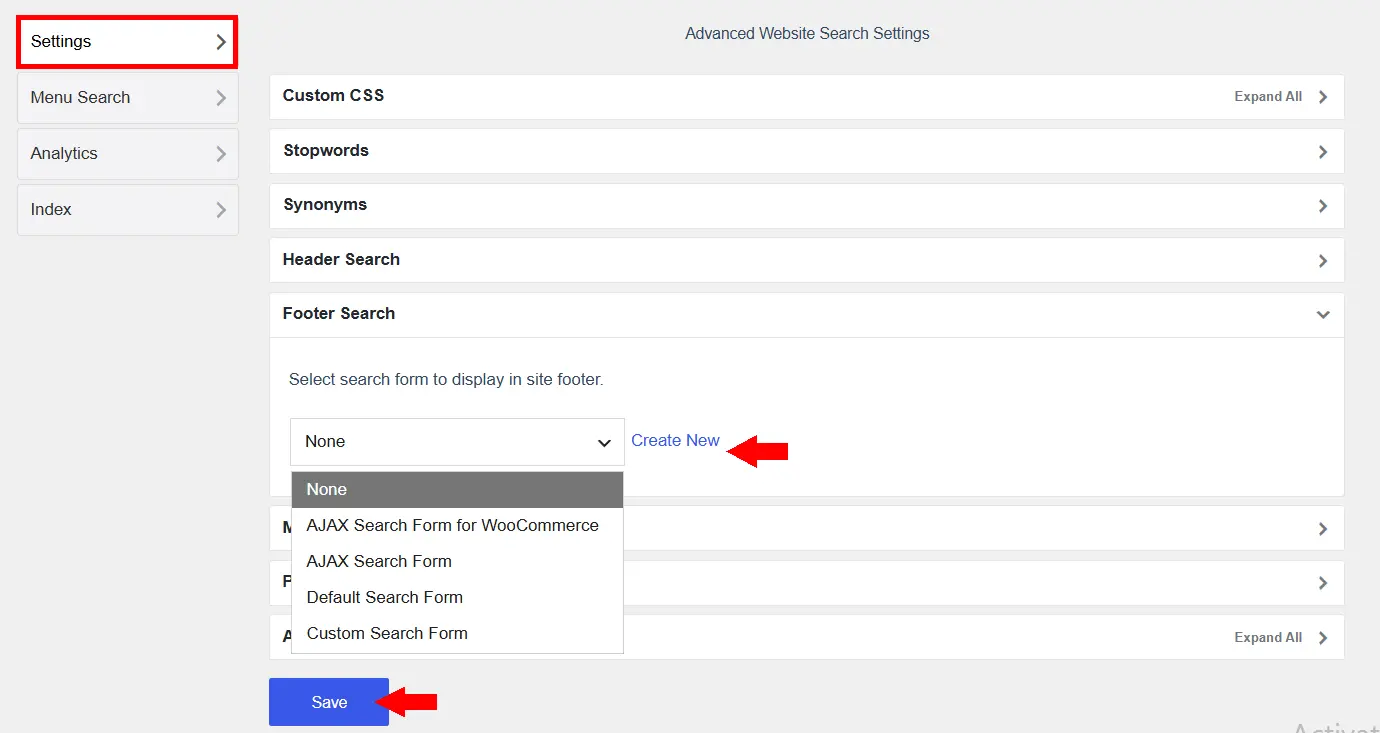
Just be careful to click Save after applying all your changes; otherwise none of your settings will be saved and you’ll have to start over.
Wrapping Up
Well, we’ve reached the end! Just like that, we were able to build a professional search form and add it to the site’s navigation menu. Now, if you take a look at your site, you’ll see the search form sitting right in its place with the style you wanted, ready for users to use easily.
We hope this guide has been useful to you and has made adding a search form to your site easier. Good luck! 🙂

Ahura WordPress Theme
The Power to Change EverythingElementor Page Builder
The most powerful WordPress page builder with 100+ exclusive custom elements.
Incredible Performance
With Ahura’s smart modular loading technology, files load only when they are truly needed.
SEO Optimized for Google
Every line of code is carefully aligned with Google’s algorithms and best practices.
To post a comment, please register or log in first.