How to Install WordPress on MAMP: Step-by-Step Guide
- Tutorials
- Updated on
Table of Contents
Introduction
Hi, and welcome back to another video from Ertano. In this video, guys, I want to talk about how to install WordPress on your personal computer. If you want to have an environment to test and develop your themes and plugins, and to design your web pages, you have to install WordPress on your personal computer. If you are using macOS as your personal computer operating system, you can install WordPress with MAMP on macOS. Let’s start.
Installing a Local Server (MAMP)
I want to install WordPress on macOS. First, I have to download MAMP as my local host web server and download it for my computer. So, I have to go to mamp.info/downloads, and then, based on my macOS CPU, I have to download one of these versions. It has different versions for Mac OS Intel CPUs and ARM CPUs. As I’m using an ARM CPU, like macOS M1, M2, or M3, I have to download and install this version. So, I’m downloading this version.

Installing MAMP on macOS
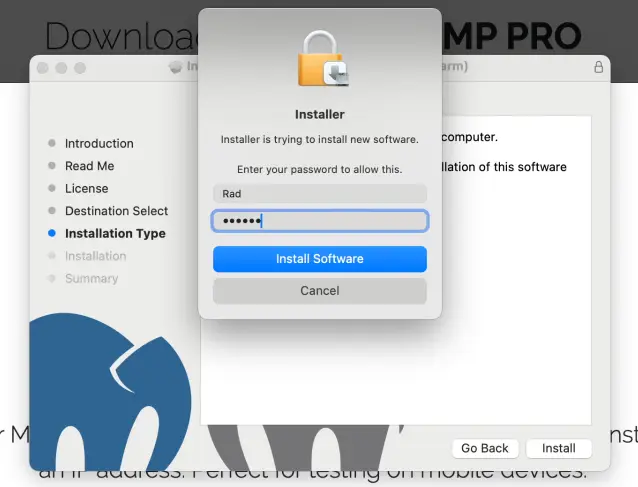
After downloading, you have to install it on your computer. It’s like any other software you install on macOS. This is a PKG or package file, and we have to install it on our system. Yes, continue, continue, continue, agree to the terms of service, and install it. Then we have to type our system password, our user password, to install this software on macOS. It takes about a minute. Yes, it’s completed.
Downloading WordPress
Now, we have to download WordPress to install it on our web server. So, I have to go to wordpress.org/download and download the latest version of WordPress. I’m downloading the latest version of WordPress from here.
Running MAMP
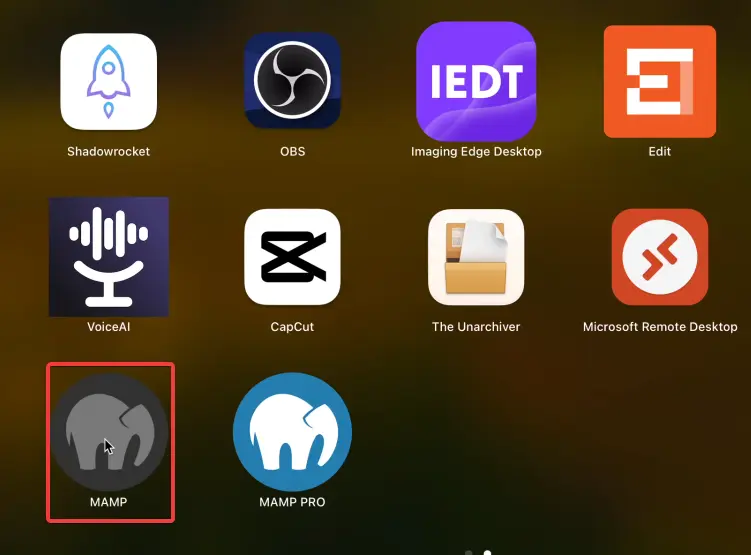
Now, I have to go to my Launchpad and open MAMP. Don’t open MAMP Pro; this is the Pro version of MAMP, and you have to buy it. We don’t need this version. We just have to run MAMP. Okay, it’s running. Let’s do a force quit and then open it again. I think it’s frozen. Yeah, now you have to wait. Yes, finished.
MAMP Configuration
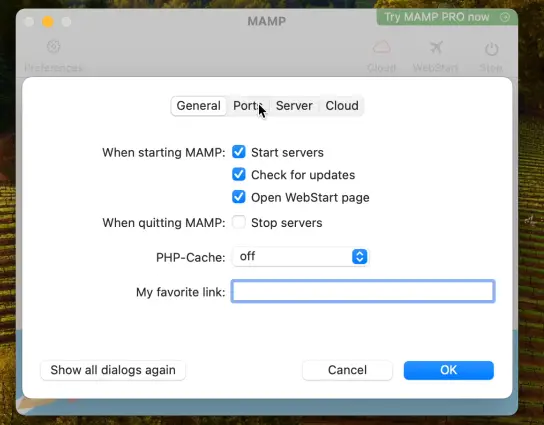
First, I will click on the Stop button because we want to do some configuration on MAMP to make it better. Now, I’m going to the MAMP menu, click on Settings, and on this page, make sure you have checked “Start servers on MAMP start,” “Check for updates,” and “Open web page on start.” Turn off the OPcache because we are using this MAMP server for development and testing, and we don’t want to cache our PHP files.
Ports and Server Settings
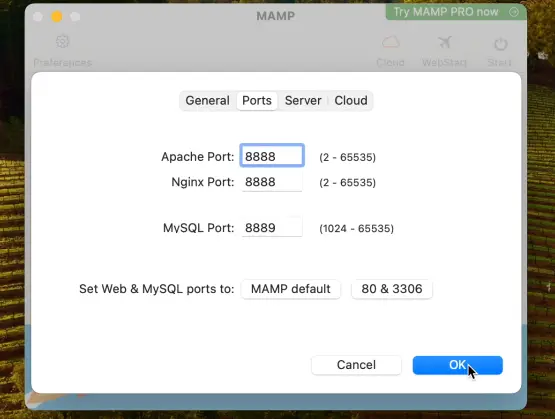
Go to the Ports section and then click on 8888 because we want to use that port for our MAMP server. Go to the Server tab and Cloud tab, make sure Cloud is off, and click OK. Then you can start your MAMP server. After it successfully starts, check your MAMP installation configuration.
Okay, let me check everything. Everything is good. Start. Okay, let’s quit again and reopen it. Start.
If you cannot start your MAMP server, you have to go to Settings, click on Ports, and then set your web and MySQL ports to MAMP default. Then you have to enter localhost with port 8888 for Apache or Nginx to open your website, because I think another application or software is using port 80 on my system. Okay, so my port is 8888. Localhost:8888 is okay.
Preparing WordPress Files
WordPress is downloaded, and I have to open this ZIP file. Then I have to go to the WordPress directory, select all files with Command + A, copy all files with Command + C, and then go to the Applications directory. Then open the MAMP directory, then open htdocs. In this folder, I have a file named index.php. I can move it to the trash. Then I can create a new folder here. For example, the folder name will be “ertano.”
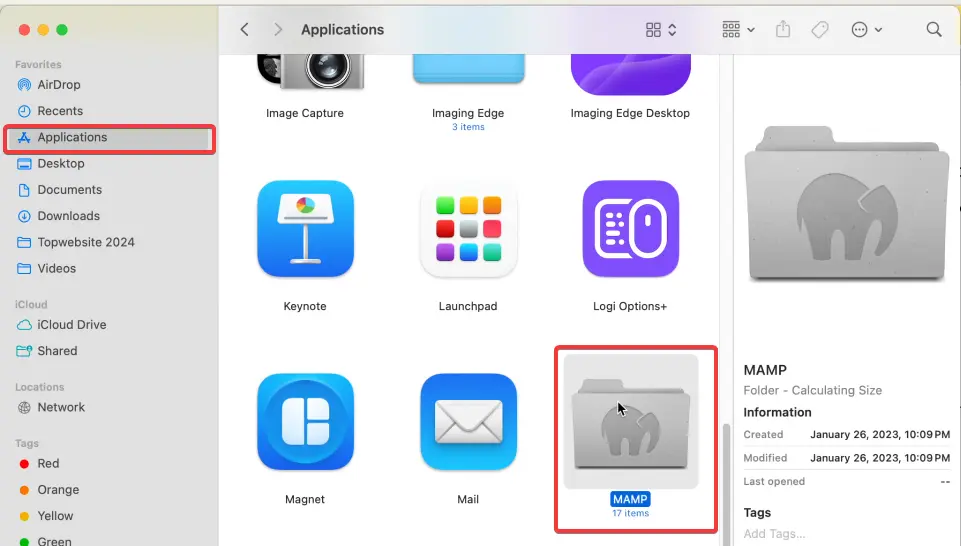
Creating the Website Directory
I’m going to the ertano directory, and then I will paste all of the WordPress files and folders into this folder with Command + V. So, my website address will be localhost:8888/ertano. Why ertano? Because my directory name is ertano.
WordPress Installation Setup
Now I have to select my language. You can select your own language here. I’m selecting English (United States). Continue.
Now we have to input our database information. What is a database? A database is a file that stores all of your website’s data, such as texts, settings, and etc.
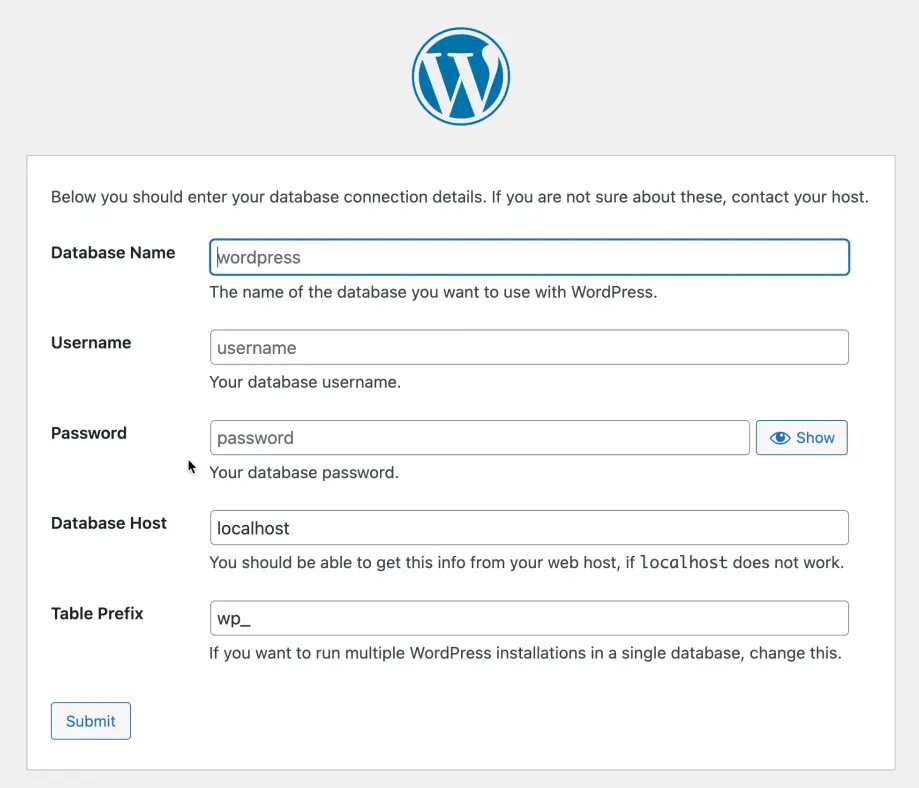
Creating a Database with phpMyAdmin
For example, to make a new database, we have to go to localhost/phpmyadmin. Here, we can create a new database. So, I’m going to the Databases section, enter a new database name, for example, “ertano.” Make sure the collation is utf8_general_ci, and click on the Create button.
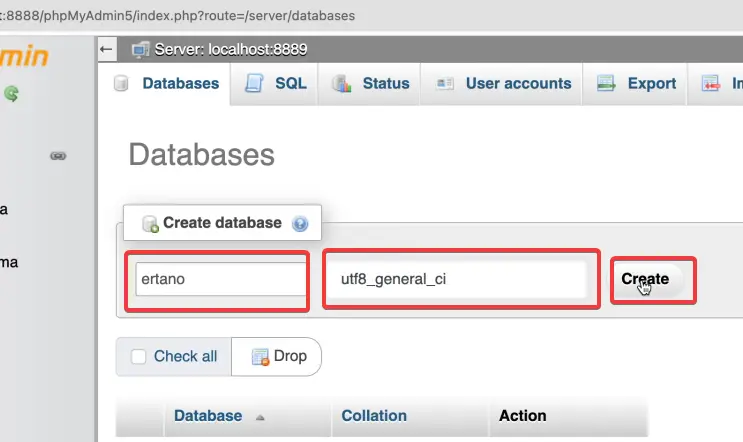
Database Credentials
Now, my database name is ertano, my username is root, and my password is root. You can change your table prefix for more security, but we don’t need to do it here because this is localhost and it doesn’t matter. Click on Submit and run the installation.
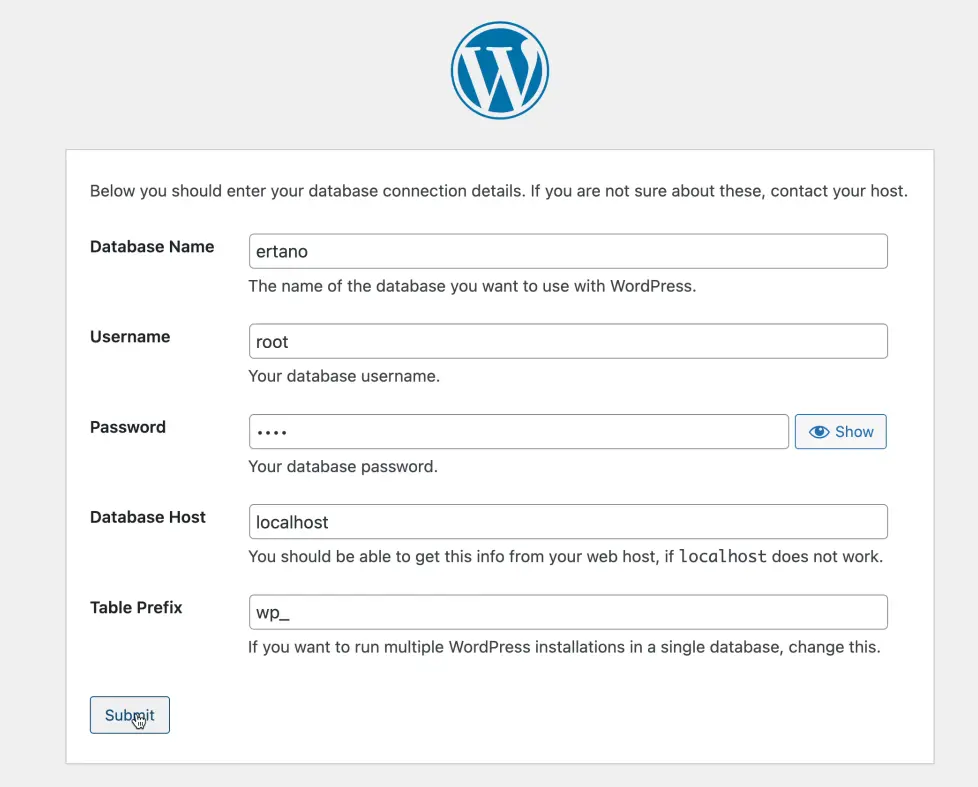
Final WordPress Setup
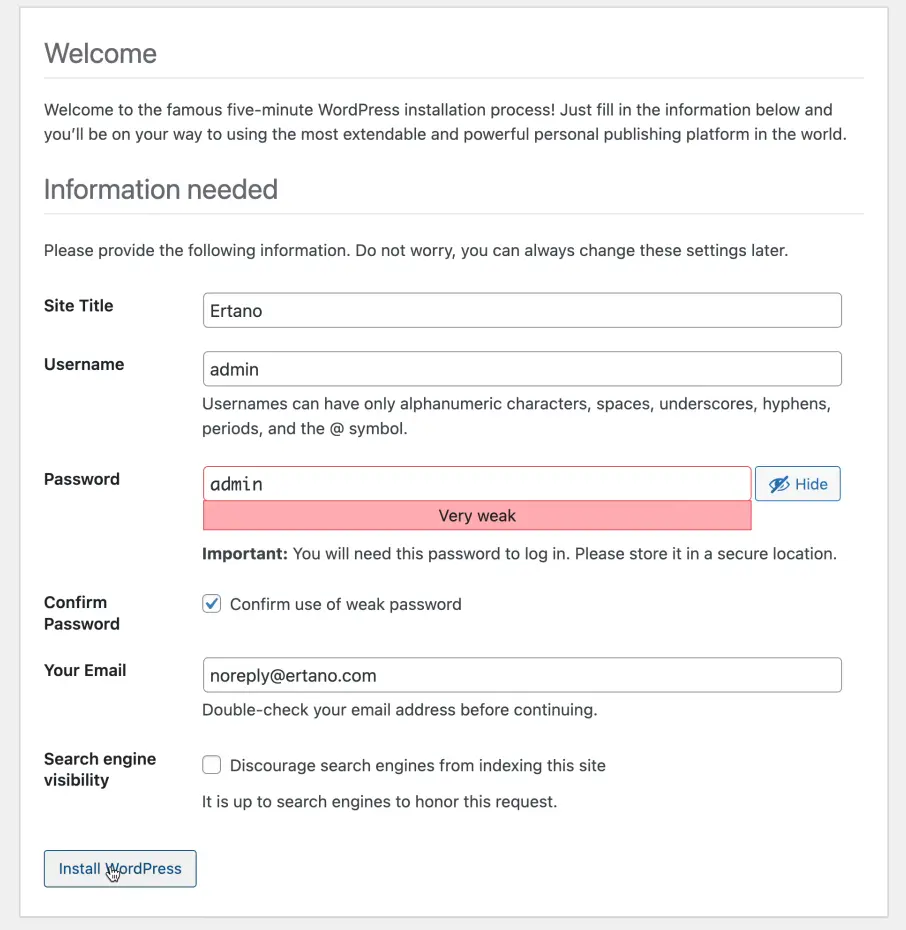
Here, I have to enter my website name. My website name is, for example, “Ertano.” My username is admin, my password is admin. I click on “Confirm use of weak password” because this is a weak password, and it’s okay because it’s on localhost and nobody has access to my localhost. I will enter my email, for example, noreply@ertano.com. It doesn’t matter. The last option doesn’t matter again because we are on localhost. Then click on Install WordPress.
Accessing the Dashboard
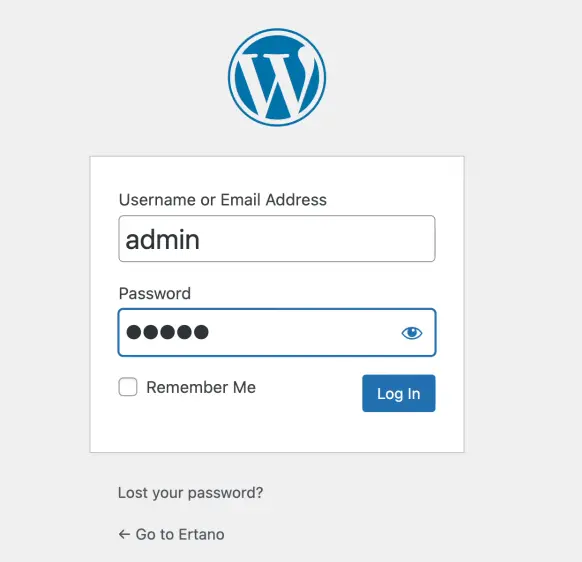
That’s all. WordPress is installed on our website. We can click on Login to log in to our admin panel with username admin and password admin. Click on Login. Yes, I’m logged into my WordPress dashboard.
Viewing the Website
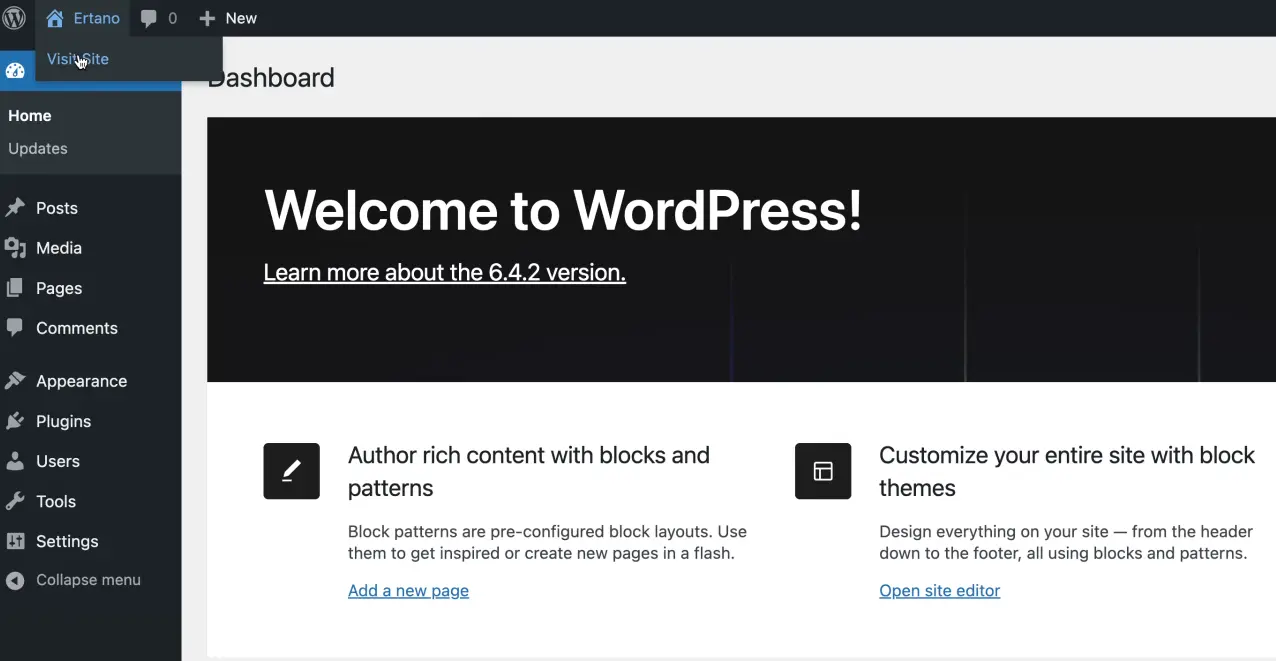
If you click on Visit Site, you can see your own website. You can develop it, test any plugins and themes, create your landing pages, and web pages. Everything you need, you can do here.
Migrating to Live Hosting
Then you can migrate it from localhost to your main host, such as cPanel, DirectAdmin, or any hosting service you have.
Conclusion
That’s it. You can install WordPress on your personal computer to test and develop your website. Thank you.
Ahura WordPress Theme
The Power to Change EverythingElementor Page Builder
The most powerful WordPress page builder with 100+ exclusive custom elements.
Incredible Performance
With Ahura’s smart modular loading technology, files load only when they are truly needed.
SEO Optimized for Google
Every line of code is carefully aligned with Google’s algorithms and best practices.

To post a comment, please register or log in first.